seriously who puts an antimatter drive on a destroyer?
All info ripped from manual!
Tactical[]
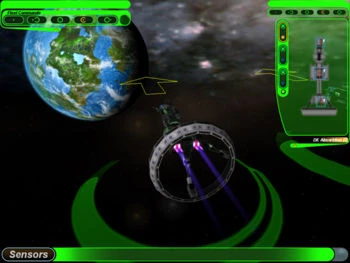
Reading the Combat HUD If you ever happen to end a turn and the game discovers that you and an enemy are in the same system, the game will drop into combat. Everything is now running real-time for the length of the Combat Timer (by default, four minutes.) As with everything else in the game, you can select one of your ships by left-clicking it, and snap focus to that selection by double left-clicking. You can also select
ships from you list of ships on the side of the screen. Right-click and holding allows you to move the camera angle around, and the mouse wheel zooms the camera in and out. You can band-box select multiple ships by left-clicking and holding on empty space, then dragging and releasing the mouse button. You can also select multiple, specific ships by CTRL left-clicking each ship. Controlling you ships in combat can be reduced to these three very simple commands; By doing these, your ships will leap into action. It’s as simple as that. But there is always more going on you need to watch out for.
Sensor View, Using a Hotkey or scrolling the camera out far enough, you will get a wide area view of the system – ships that you cannot yet see with the naked eye will appear in sensor manager. If you have the right level of technologies, you might even be able to see ships that are attempting to use Cloaking or Stealth technologies.
Combat Planes
[]
To keep combat visualization easier, combat takes planes in roughly the same, flat area, but it is not two dimensional. When controlling your ships, you have the option of moving them between three combat planes, or levels. This allows you to move your ships together in a three dimensional formation, or to roll your ships so that difference sides of the ship are being presented to a particular combat plane.
Advanced Ship Controls
[]
At the bottom of your Combat HUD are specifics about your selected ship. To the left is the level of damage each section of the ship has taken, and the ship’s stance – the semi-autonomous behavior it will follow if you’re not currently paying attention to it (very handy if you’re focus is on another part of the battle.) To the right are the specifics on the Supplies, Energy, and Crew of the ship. A lack in any one of these will impact the performance of your ship or even in dire circumstances; strand it in the system until it can be re-supplied. In the middle are your Advanced Ship Controls – the three settings to the left adjust the speed at which your ship moves. Below is full stop. To the right the three buttons dictate which Combat Plane you’d like the ship to be on. And in the middle is a circle divided into four parts, representing the top, bottom, and sides of your ship – clicking one of these buttons will roll your ship to that side.
Armor, Damage, and Critical Damage
[]
When you have selected a ship, and you are moving the camera around, you will notice some ghostly grids hovering around the top, bottom, and sides of each section of your ship – this represents the armor of that section. Once depleted, shots hitting that section will begin damaging the section itself – there is even a chance that a shot will make a Critical hit, which can have a variety of effects, such as killing crew, reducing the efficiency of ship systems – weapons recharging or targeting, engine speeds, etc. – and destroy supplies. As well, if a section has a special function, such as Command and Control or Deep Scanning, and it is destroyed, it will cease to manage that function. It is important then to watch your armor and protect weak areas, either by removing the ship from heavy combat, or moving to a new position using the Combat Planes and Ship Rotation.